Well, there hasn’t been too much progress, but I though I would give an update, anyway. When we last spoke, I had just glued the first sheet of pink foam to my frame. The next day, I felt that their wasn’t enough glue holding the joints, so I put another layer of Liquid Nails around the seam lines. Once again, I weighed the frame down with some college textbooks.
After that had dried for a day, I felt it was dry enough and strong enough to flip over. So I turned the whole assembly “right side up.” The liquid nails seem to hold very strong, and I was happy to discover that the whole thing is still very lightweight. My next task was to glue the second layer of Pink foam. Apparently the measurement of this was off by 1 inch, so one when gluing them together there was a 1 inch gap between the pieces. However, I had plenty of foam left over, so I just cut a small strip to fill the space. Again, I used liquid nails to glue all of this together and weighed the sections down with Norton Anthologies. I guess they’re good for something!
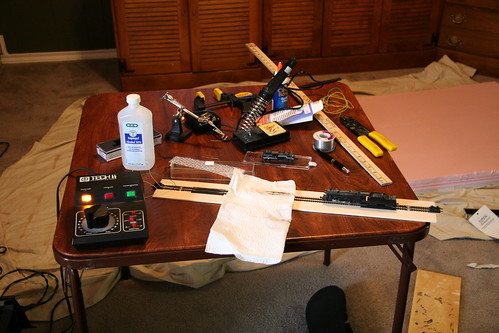
My track came in on Friday, but most of Saturday was spent with heavy books on top of foam, so I couldn’t get straight to track planning. So in the meantime, I decided to make a Locomotive test/cleaning station. I went to Hobby Lobby and picked up some dirt cheap small paintbrushes (for dusting the locos) and a small strip off Basswood. When I got home, I glued some straight track and two Atlas re-railers directly to this strip. Next, I soldered on some feeder wires. This was an adventure in itself. I should have used some flux paste, but opted not to waste any as I didn’t really care about the quality of this trackwork, so long as current got to it. Well it has been years since I’ve soldered feeders and DAMN it is no fun at all. I need to practice!
On the topic of soldering, I’ve pretty much decided that I will solder all of the track together, except for the turnouts which will be “free-floating.” All of this will have to be done “at the workbench” due to the ability off the soldering iron to melt the foam. It will be a pain in the ass, but necessary for good electrical conductivity. I’m also planning to drop feeders every foot and a half or so. I don’t think each piece of track in necessary, but I’ve learned my lesson that more feeders = better running.
But I digress. Back to the test stand. I now had a nice stretch of straight track with power. I got out the first loco (an Atlas Shay) and gave it a test run…With some prodding, she finally began to move. I think part of the problem is these locos need to be broken in more—most have not run in nearly three years (some even longer!).
Every loco needed the wheels cleaned. To accomplish this, I took some strips of paper towel and soaked them in rubbing alcohol. Next I laid the wet paper towel across the track, and moved part of the loco’s wheels on top of it. The trick is to keep part of electrical pickup of the loco on the non-paper-toweled section, and then crank the throttle whilst holding the engine in place. Do it right, and the drivers spin, wiping gunk off.

I was able to get almost all of my motive power running again, save for a few stubborn and old locomotives which need more than just a good cleaning. The Kato Mike (which is now 13 years old!) had never had the wheels cleaned and my GOD I was astonished at how black the paper towel was. I may need to do another cleaning of this loco with goo-gone first, as there is still a visible bit of gunk on the drive wheels. No wonder she had trouble moving!
With that bit done, it was time to finally start messing with the track. I quickly discovered two things: 1) I could use more 19 inch radius stuff than I though and 2) I didn’t buy enough 19 inch radius track.
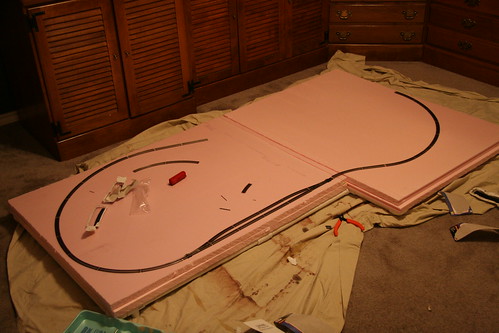
Here is a picture of the basic plan that I’ve mocked up. I’m well aware that it’s a little lopsided. My goal here was not to put the most track possible in place (the “spaghetti bowl” seen so often on small layouts) but to instead emphasize broad curves and to get away from the “train set” look of straight tracks parallel with the edge of the layout. On the back straight section, there will be a right-hand switch that leads to a yard/steam loco maintenance facility. On the passing track at the front of the layout, there will be a switch leading off to industrial spurs, etc. I can’t afford many switches now, so these things will have to come later.
Anyway, I placed one more order with gohobbies.com for another Peco switch, some more 19” radius track, and a 2008 Walther’s catalog (only $5 for catalog, so I thought why not!). This amount of track should get me a basic loop and let me start to run some trains.
Unfortunately, I won’t be able to do much this week since I need to clean the house for a visit from my parents. I may work on some structure kits that I have left over from the last go around. In any case, things are progressing, just slowly!

No comments:
Post a Comment