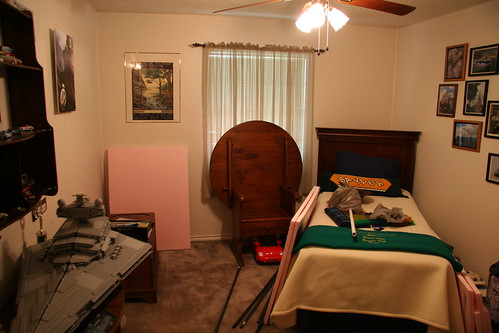
First, we have a shot of where the layout will go. Originally, the table/chair was in the table configuration, with the old layout on top of it. I removed the old layout and shuffled some things around. Wow! I have a lot more space here than I thought! Good to know.

Speaking of the old railroad, here’s the final picture I took before hauling it to the dumpster this morning. I salvaged a bunch of turnouts, some insulated rail joiners, and three terminal strips. If you know me, you know how hard it is for me to throw things like this away (especially things that I spent several hard hours and several hundred dollars working on. But I was out of space and wanted to get the old one out of my sight. So off to the rubbish bin it goes!
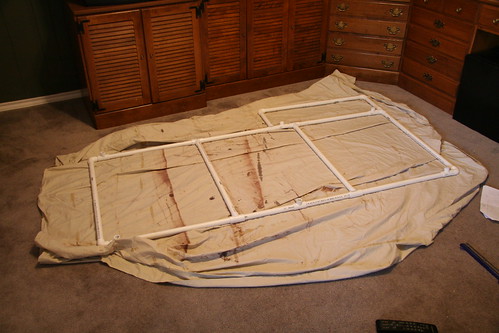
Next, we have a picture of the PVC frame that I built for the railroad. Not much to say, it’s a bunch of PVC pipes.

…and here is what it looks like on the legs. I’m still not sure about the stability of these legs, but we shall see. The nice thing is that thanks to snap on PVC fittings, I can easily change it. You can also see the foam that I got, too. More on that in a moment.

Finally, here is a picture of the foam being glued to the frame with Liquid Nails.
Since I last wrote, I picked up the 1” pink polystyrene foam insulation that will serve as the foundation for the railroad. I went to Home Depot for this, as Lowe’s only had ½” thick sheets. I really wanted a 2” sheet, but apparently they don’t have those in Texas. (This doesn’t make sense to me, because insulation is supposed to keep the air temperature stable inside the house, so why wouldn’t you want to use the thicker kind?).
The stuff is only sold in 4x8 sheets. Said sheets most definitely do NOT fit in a VW New Beetle. So I had to get them cut. I found a salesman to help me and he was more than happy to do so. Now, I thought we could just take them to the circular saw, make the four cuts, and be done with it. But apparently the guy that was helping me either didn’t think of that, or didn’t think it would work. So he tried cutting it with a regular razor blade. Well, that didn’t go over to well (it wasn’t deep enough), so he went off in search of better tools and returned with…a kitchen knife. No, not even a steak knife—a plain old kitchen knife.
Now, I’m internally laughing at this whole situation. Here we are in the HOME DEPOT of all places, and the best tool this guy can find is a kitchen knife. When this clearly won’t cut it (hah!), he goes off again and returns with a handsaw. Finally we make some progress and the foam is cut in minutes. I really was grateful for his help, though, and at no charge!
I got the foam home. It barely fit in the car, and now there are pink beads in the backseat! The first thing I did was vacuum each piece to remove excess beads. I tell you this stuff is a mess when it’s cut. It’s not as bad as the white-beadboard Styrofoam, but still bad. I should think about getting a hot-knife/wire for making the scenery out of this stuff.
Next, I set the layout up on the legs in the layout room. It’s actually fairly stable when up against the wall. With a sharpie, I marked the angle of the snap on leg supports, then hauled the whole frame outside and glued them in place with PVC cement. And man is that stuff noxious! But on the good side, it sets extremely quickly!
After yet another trip to the hardware store, I returned with some tubes of Liquid Nails for Projects. If you use this stuff, be absolutely certain you get the latex-based kind. The “normal” kind will eat through the foam! You apply the Liquid Nails using a caulk gun, which I had never used before. And man is it fun. I wish I had some things to caulk around the house, just so I could mess with it more.
I placed the frame on top of the pink sheets, carefully positioning them to get the closest fit. Despite my careful measurements, the pink sheets are a little bigger in spots then the frame (I’m guessing the 4x8 sheet isn’t “exactly” 4x8). But in the end, this isn’t a problem as I can easily cut the stuff later if I want. I marked the frame’s location on the foam with a sharpie, then lifted the whole thing up and applied a generous bead of Liquid Nails in the marked zones. I carefully set the frame back down, using the guidlelines and “eyeballing” it to ensure proper fit. Then I added beads of Liquid Nails along the sides of the frame. Finally, I laid some heavy college textbooks (thanks, Norton Anthology of American Literature, I finally found a use for you!) on top of the frame to weigh it down.
So that’s where I am at the moment. I’m hoping by the end of next week my track will be here, and I’ll be able to start working on a trackplan. I’m going to try and get my basic loop done first, and any turnouts will have to come later. I have been considering a double track main, but when I think about the prototype (small mining subsidiary), that makes no sense. So I’m still thinking about it.

We used caulk to adhere the bottle caps to the car. It's fun, isn't it? :-)
ReplyDelete