It had always been my goal to make another loop inside the initial one. But to do so, I needed 5 more turnouts. It took a while for me to save up enough to buy all those, but a Birthday present from my Granddad finally tipped the scaled. In addition, I dug through my box o’ junk (ever model railroader has one) and found TWO of the Peco Electrofrog switches from the layout I had started in high school. (It’s a pity I didn’t use all electrofrog switches on that layout, as I would have plenty of turnouts if I did).
(Side note: The “frog” of a turnout is the part where the route diverges. Most commercial turnouts have insulated frogs, which makes wiring easier. The Peco Electrofrogs are powered through the frogs, which makes stalling on a turnout a rare occurrence. This is important if you’re like me and run small-wheelbase locomotives.)
I’ve never been a very good track planner on paper, so I started by simply mocking up the track for real. Pretty soon I came up with a loop that 1) made me happy and 2) worked with the track that I had. I decided pretty early against doing a simple double track main, as I figured that would get a little boring. In addition, I knew I would need flextrack to do that, and my nearest source of flex track (nee ANY MR specific item) is 100 miles away.
After blocking out the track, I moved everything off the layout and then hauled the entire thing off to the living room. I thought it would be easier to work on the layout if I had access from all sides, and I wasn’t really looking forward to soldering all that track in the back of the layout, either.
With the layout in the living room floor, I blocked out the track again. My next task would be to cut out the foam shapes I would need for the cookie-cutter roadbed.
Let me say this: Lesson Learned: next layout, none of this cookie-cutter nonsense. I started out doing that because I thought (as told by the gods at Woodland Scenics) that it would be easier when it got to scenery. Well, that remains to be seen, and cutting foam is a PITA. Last time I pretty much bored a tiny hole in my skin from the handle of the kitchen knife I used to cut it.
This time, I was determined to get a proper cutting tool, so I went to Lowe’s and invested in a nasty-looking thing I’d seen recommend on the various MR forums: A wallboard saw. This tool is designed to cut sheet-rock and other wall materials. Both blade surfaces are serrated, and the tip of the knife comes to a sharp, broad point. It’s easy to puncture the foam and saw out what you need.
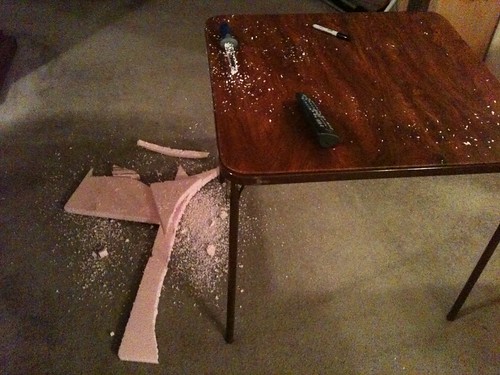
Anyway, I took a few sections of track at a time, laid them out on the foam (I still had enough left from my initial foam purchase), and cut out sections with the saw, using a cardboard table brace the foam against whilst I cut.

After all the pieces were cut, I laid them out under the track and marked their placement on the layout with a sharpie. Then I removed all the track and got out one of my favorite tools: the caulk gun.
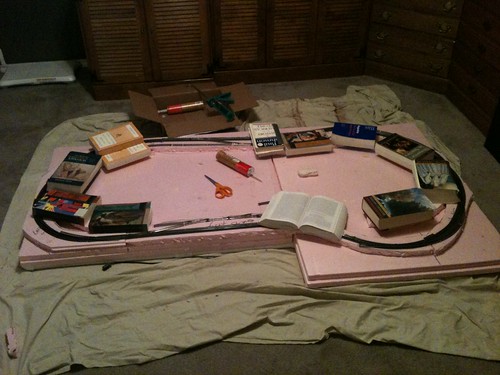
I don’t know what it is about this thing but it sure is fun to use. I still had two tubes of “Liquid Nails for Projects” left from the last time I did layout construction. I spread a liberal bead of the tan glue over the areas where the pink foam risers were going to go, then smoothed it out with a spare piece of scrap foam. After waiting a few seconds for the glue to get a bit tacky, I pressed the pink foam into place, then weighed each piece down with old Norton Anthologies. Who says college doesn’t pay?

After waiting two days for the glue to fully dry, I removed the books and laid out the track once again. I used a sharpie to mark the location on the foam. The next step was installing Woodland Scenics’s trackbed. This is a roadbed product that is a substitute for the traditional cork. I used it on my last layout and loved the stuff, so I’ll probably continue to use it from now on. It’s very easy to shape the curves.
I bought a continuous roll, so I was able to lay the roadbed in one single piece. Made things very easy. I have a small 4.5” bridge on the inner loop, so I started laying the roadbed at that gap. I spread a thin film of Woodland Scenic’s foam tack glue on both the roadbed and pink foam, then let it sit for a few minutes to get tacky. I then carefully pressed the roadbed into place, adjusting it to fit the track. I pushed ordinary push-pins into the roadbed to hold it down while the glue dried (especially necessary on curves).

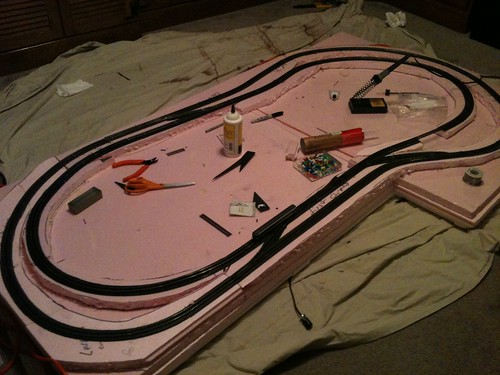
After waiting ANOTHER DAY (model railroading has a lot of “hurry up and wait”), I removed the push pins and laid out the track one final time. I spread another bead of foam tack glue on the roadbed, then pushed the track into place, again securing it with the push pins. After another 24-hour waiting period, I removed the pins, then pushed around a Swiss passenger car (the longest car I have) on the newly-laid rail to check for any obvious problems.

Next time: wiring.
