Wednesday, May 20, 2009

Pictures!

Here are a few pictures from the "Golden Spike. See Flickr for more.

Mike

Rollin

Rivarossi Mike

An overall look

Tuesday, May 19, 2009

Golden Spike

Well, I don’t have any pictures uploaded yet, but I thought I should report that I’ve had the “Golden Spike” and have begin running some trains for the first time in three—almost four, actually—years.

Saturday morning dawned grey and rainy—a perfect day for staying inside and working on projects. I spent part of the morning working on a structure kit. It’s nearly finished now—just needs a roof and some figures and it will be done. After lunch, I ventured outside to go get wire at the local Radio Shack. I picked up some spools of 22 gauge solid, and 18 gauge stranded. I also got a new tip for my soldering iron.

When I got back, I had to figure out exactly how I was going to wire the thing. Right now, I just have one loop of track. Since that was the case, I decided to forego any sort of cab control and just wire it as one block. (I’m also toying with the idea of converting to DCC, in which case everything would be wired as one “block” anyway). When I get some more track, it will be easy to convert to cab control without having to tear everything out.

I decided to attach four sets of feeders to the rails. I dug out holes with a screwdriver (foam is great…no powertools here!) and fed pairs of red/black 22 gauge solid through them. The Solid core copper wire is much easier to solder to the sides of the rail than the stranded stuff. I had my first set of feeders fed through, so I plugged in the soldering iron and POP there was a flash of light. I cursed as I realized I had shorted out the soldering iron. Which meant yet another trip to Radio Shack!

I finally made it back with a new 40 watt iron, and set about the process of soldering the feeders to the rail. Essentially, you coat the rail and the wire with flux paste, then tin them (which means coating with a thin layer of solder), and then attach the wire to the rail without using additional solder. It’s a little more difficult than it sounds, because you have to get the wire positioned correctly whilst holding a 40 watt soldering iron. Have to watch your fingers.

Anyway, the process is fairly straight-forward. My feeders won’t win any awards for neatness but they get the job done, and after ballasting the track they’ll be nearly invisible, anyway.

Once my four sets of feeders were in place, I flipped the layout up and leaned it against the couch, then screwed and glued on three terminal strips to the bottom—one on each end and one in the middle. I used 18 gauge stranded wire to connect everything together, meeting at the terminal strip in the middle, to which I attached a longer cord that has a cinch-jones connector on it (think of a miniature normal wall plug and you’ll get the idea). This makes it easy to hook up the power pack.

Once the wiring was completed, I turned the layout back over, cleaned the rails once with a track-cleaning block, hooked up the ancient MRC Tech-II throttle, and set the Kato Mikado on the rails.

And wouldn’t you know it, it actually worked?

I ran the locomotive back and forth for a few moments, and then I could not help but gleefully tear into my storage box and open up every single piece of rolling stock I have. I’ve got a bunch of stuff that hasn’t been run in years. To my great joy, every locomotive I have actually runs (though some are better than others…the K4 Pacific from the 70s has to go at warp speed to do anything…). Even the Bachmann 4-4-0 does well; I certainly made the right decision about the Electro-frog turnouts, because I haven’t had any stalling on turnouts whatsoever.

I’ve spent the last week simply running trains. There are still some track issues to be addressed, and I need to add some more feeders (which will involve cutting gaps in the rail…more on that another time). But it certainly is a joy to see the Mike pull my set of Pennsy passenger cars, which I haven’t been able to run since at least 2001 (probably before that…)

This blog post wasn’t quite as detailed as I wanted it to be, but I’m exhausted and it’s past my bedtime already. I’ll try to get some pictures put up soon!

Wednesday, May 13, 2009

The Circle is Complete

Sorry for the lack of updates; it has been a busy week and I haven’t found much time to write.

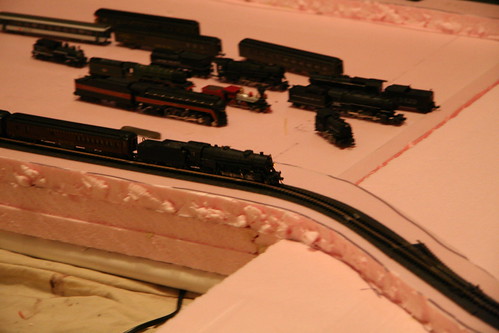
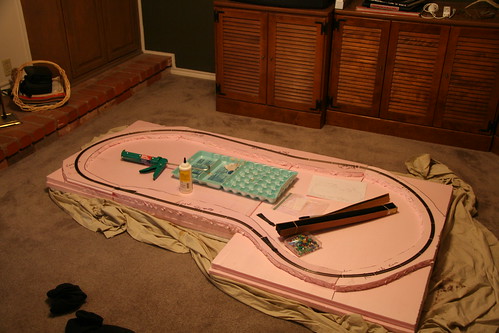
When we last left off, I had completed a basic outside loop of track. The geometry is a little iffy, so I hope it all works well. It’s a little hard to tell. It would have been much easier to do using flex track, but given my past history of flex track, I really didn’t want to mess with it. Not to mention I can’t GET any without waiting at least a week or driving 200 miles.

In any case, once I had this basic loop, I made a paper template (1:1 scale) of the track and divided it into four basic sections. I took these four templates and laid them out on the spare pieces of 1” thick foam that I had, and traced around them with a sharpie. I placed the foam on a cardboard table, and then took a heavy sharp kitchen knife and cut out the lines. It wasn’t necessary to cut all the way through the foam—just to cut most of the way. Once the lines were cut, I was able to carefully snap the pieces off, just like using the “score and snap” method of cutting styrene.

Side note: I later found that putting my index finger on the top edge of the knife had bored a hole in my skin. Nothing major, but I will certainly cover the knife with a thick towel or something beforehand the next time I cut the foam.

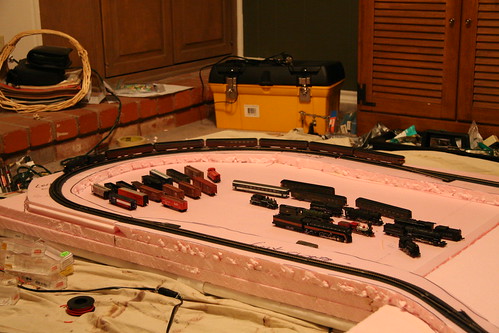
I now laid the foam pieces out in the general shape of the track plan, and attached them to the bottom sheet of foam with Liquid Nails. Once again, thank you Norton Anthologies for finally pulling your weight!

If you’ve never built a layout before, you may be asking, “why elevate the track with another layer of foam?”

Take a look outside. Unless you’re one of the poor souls that live in Lubbock, chances are you can see some chances of elevation in the lay of the land. The “1:1” world is not built on top of plywood. There’s rolling hills, dips and valleys, gorges, mountains, waterfalls, and all kinds of things. In fact, the world is pretty damn bumpy.

Elevating the track up another level makes it much easier to model all these geographic features. Combined with being able to cut out the foam, it’s much easier than trying to build up everything from plywood. This is the first time I’ve actually built a layout like this, so time will tell how it goes.

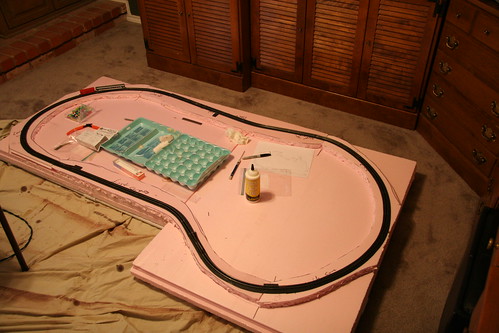
I let the new pieces of foam dry with the weights on them for a good three days. Two would have probably sufficed, but I had company so I wasn’t able to do anything. The next step was to once again lay out all the track and ensure that it fit. It’s a good thing that I made myself a detailed track plan so there was no doubt as to which pieces went where!

Test fit...

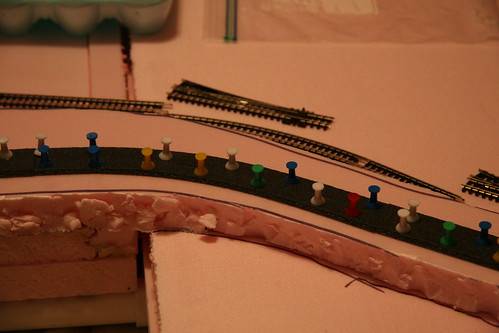
After this track had been laid out and I was reasonably happy with how it looked, I took a sharpie and drew out the plan onto the foam. Working a section at a time, I glued down Woodland Scenics Foam Roadbed. Now, the traditional roadbed material is cork, but I used the foam stuff on my last layout and I really like working with it. It’s very easy to cut, and much easier to curve than cork is. Not to mention cheaper.

The roadbed was held in place with some cheap push-pins that I got at office depot. By the way, I used my 8 year old bottle of foam tack glue, and it still works great. Good stuff. I let the roadbed dry for a few more days. It had to conform to some tight curves, so I wanted to be sure it would stay in the correct spot.

Gluing down the roadbed.

In retrospect, I went about this all wrong. I have several spots where the roadbed simply doesn’t conform to the final position of the track, even though I test-laid the track as I was gluing the roadbed. Next time, I’ll probably lay everything all at once.

While the roadbed was drying, I decided to break out the soldering iron and solder some track together. It’s pretty much the only way to ensure a good electrical connection. I’ve gotten a little better at soldering over the years, but I’m still very much a novice. But I’ve discovered the one great secret to soldering rails: Rosin Paste. The paste is a gooey, yellow substance that helps the solder flow where you want it. It only takes a tiny amount, so a toothpick is the perfect applicator. After that, I simply hold the soldering iron to the railjoiner for a few seconds, and the solder flows freely. Much easier than I thought it would be. I can’t even imagine soldering without the paste now.

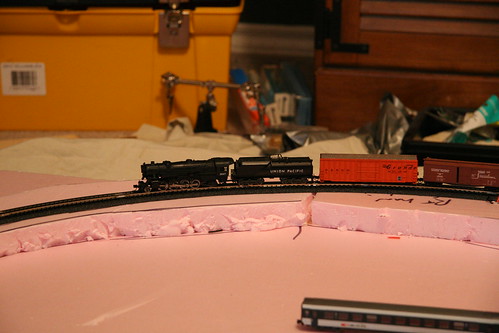
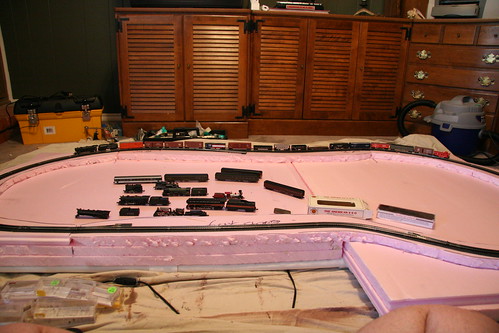
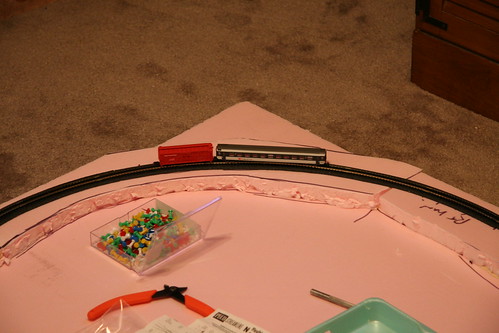
I decided to only solder the straight sections, as I was worried about soldering the curves and then having them not join up right. So with the roadbed down, I decided I might as well go ahead and glue down the track. Once again, I spread out the foam tack glue, then held the track in place with pins. I also took great care to let the turnouts “float” (in other words, they are NOT glued down). To my surprise/relief, everything seems to fit well, and two days later I took out the pins and rolled some cars around. It seems very smooth at this point, but rolling some cars around can’t match actually pulling a train.

IMG_2867.JPG

Overall shot

Next: it’s time to get some power to the rails. Wiring can be fun! (It can’t be fun.)

Also, in case you haven't figured out, all the photos (and more photos) are on Flickr:

http://www.flickr.com/photos/cameron_talley/sets/72157616587278989/

Sunday, May 3, 2009

Back on Track.

Last Thursday I finally got my second shipment of track in, so this weekend I was able to “finish” the track planning and finally make some progress beyond rolling pink foam plains.

Let’s talk about track planning. I’ve never been very good at it. Over the years I’ve gazed at hundreds of plans in Model Railroader and various books. I’ve ogled at basement empires with a double track main, broad curves, and huge industries and yards. I’ve looked at clever plans that cram a lot of action, including operation, in a small space. And yet, for all the hundreds of plans that I’ve seen over the years, when I put my pencil to the paper and try to sketch out something, I just can’t seem to come up with anything decent.

I don’t know what the problem is. As has been recounted previously, the last layout I did, I got an Atlas paper track planning template kit, and laid it all out on the floor and rearranged until I came up with something I liked. Well, that works great, in theory, but in practice it wasn’t so good. Paper and track do not align exactly the same, so I ended up having to make a huge compromise in the plan that I was never very happy with.

This time around, I thought I would just “wing it,” so-to-speak. Well, not exactly. I am torn between the desire to come up with a good plan and the desire to actually see some trains roll. So I decided to complete one outer loop, with some switches thrown in for future expansion. I’m limited on funds and can’t afford all the turnouts that I would need for a yard yet, as it is.

I spent about an hour on Friday night playing around with different track configurations to come up with something that I really liked. I did have to cut one 11 in. radius curve to fit. Hopefully I won’t regret that. I used all sectional track, as my past experience with flex track was not very positive. Flex track sounds great, until you have to lay it on a curve. If you’re not familiar with the stuff, it’s a 3-foot long section of track that has one fixed rail, and one that moves freely. This allows you to curve it easily.

The problem with flex track is that you have to use a large compass to draw out the curves beforehand in order to get their radii consistent. And then you’ll have to cut it, as one end will extent far beyond the other. Finally, you to have ensure that the rails remain in gauge on tight curves and joints. Basically it’s a major pain in the butt. So sectional track it is.

On Saturday morning, I put rail joiners on all of the track and formed a complete loop for the first time. I then took a couple of heavyweight passenger cars (they have a long wheelbase—about 85’ I think) and pushed them around, looking for any obvious issues. I didn’t find anything particularly glaring, so I decided to call it “done.”

Next time: More Pink Stuff and Liquid Nails.